This is my first year growing snaps, and I’m excited. Maybe a little TOO excited. I love line flowers, but for some reason have never grown any. I can’t wait to work them into bouquets! I was good and limited my selection to four highly recommended types (they are supposed to bloom in different seasons), but I’m still pining over the one that got away, lol. Maybe next year! That’s part of the fun; there’s always next year. The downside of trying these new techniques and never having grown snaps myself is that I don’t know what kind of plant to expect. I guess this is going to be a bit of an experiment.
Snapdragons apparently bloom best in late spring and early fall, when the days are shorter and aren’t scorchingly hot, but I am growing Rocket, which is an all-season variety and should go through the summer as well.
I just ordered ivory Madame Butterfly a couple days ago, because I realized my early summer flower selection might be a little on the light side and I wanted something I could mix with sunflowers for a nice bright early season bouquet. I’ll plant those soon!
Colors:
Rocket should produce a wondrous range of hues-cherry, pink, lemon, red, orchid, gold, lemon and white.
The Chantilly Light Salmon and Chantilly Bronze should be pink and orange.
And the ivory Madame Butterfly, should be, well ivory.
This array should be beautiful with my dahlias!
As a fun note, these flowers are edible, although I hear they are a bit bitter. What a lovely garnish! I may have to find something fun to decorate with them this year…
Planting Methods:
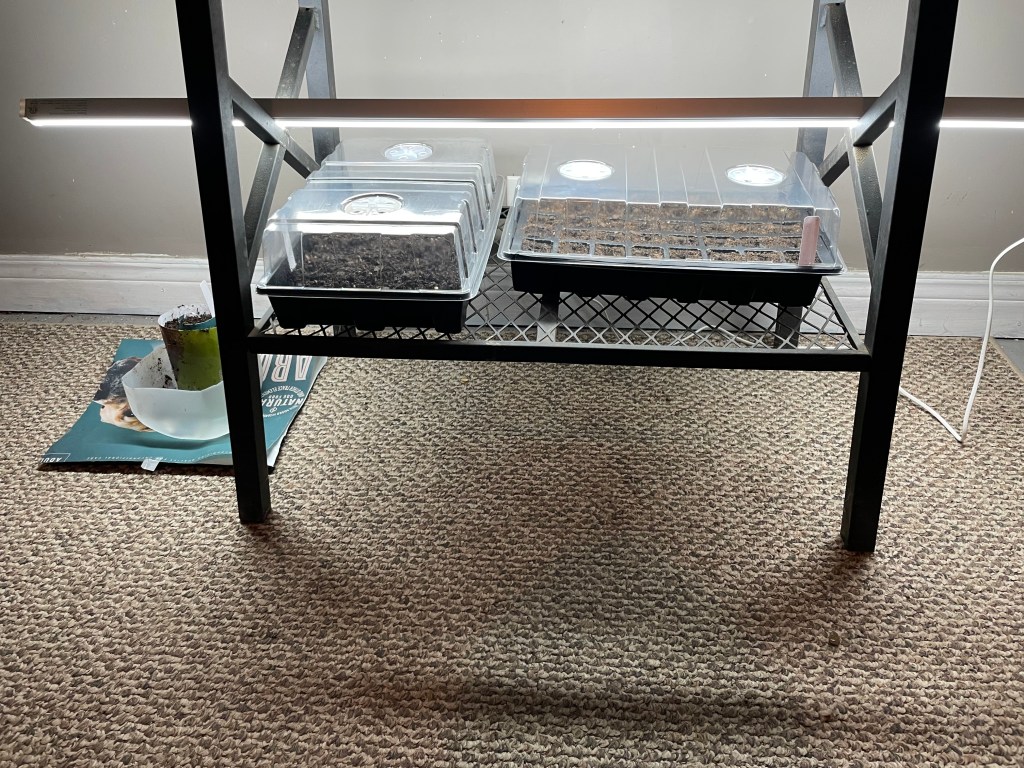
Setup: Three different starting techniques. 1) Direct sow. 2) Scatter sow, then transplant later. 3) The Seed Snail.To do an actual tree comparison, I should try each plant type using all three methods, but due to space, I may just try the three methods and decide which one works best for me, doing a true comparison next year. For simplicity, I’ll probably do that, since everything is brand new to me this year. I’ll experiment more once I have an established routine!
1. Direct Sow:
This is my usual way of seed starting. The moistened potting soil goes in the trays, the seeds go in the individual spots in the tray, the dome goes on the seeds and they go into a warm spot under grow lights.
I was planning to sow several seeds in each cell and thin them later, but there were only about 50 seeds in each packet and I’m hoping to end up with 40 plants, so I only planted one seed, and I’ll see how many germinate!
2. Scatter Sow, then Transplant:
I’ve been hearing a lot of chatter about this type of planting for snaps because those dust-like seeds are so doggone tiny! My eyesight isn’t the best, so if I can easily get the seeds growing and gently transplant the plants into the tray without any ill effect, this will probably end up being my favorite method for snaps.
I poured the tiny seeds into a little soy sauce bowl saved from when I lived in Japan (it was the smallest container I could find!) then picked a few seeds up on a finger and shook them off into the tray. Then I repeated the process, starting at one side of the tray and moving to the other. I could have just opened the packet and tossed them over the soil, but since I didn’t have a lot of extra seeds, I didn’t want to accidentally plop them all down in a single clump!
I’ll update this post later to include the transplant process!
3. The Seed Snail:
This is another technique I’ve been seeing pop up. My mom suggested this one (thanks, Mom!) and it looks quite intriguing. I haven’t seen it recommended specifically for snapdragons, but if it works, it may actually be the best of both worlds.
The seed snail, in case you aren’t familiar, is a planting method that doesn’t use seed trays. All you need are a strip of plastic or heavy paper (I used an empty dog food bag) and damp potting soil.
Once you have a strip of plastic, add about a half inch of soil across the entirety of it. I suggest you do this outside; I made a bit of a mess!
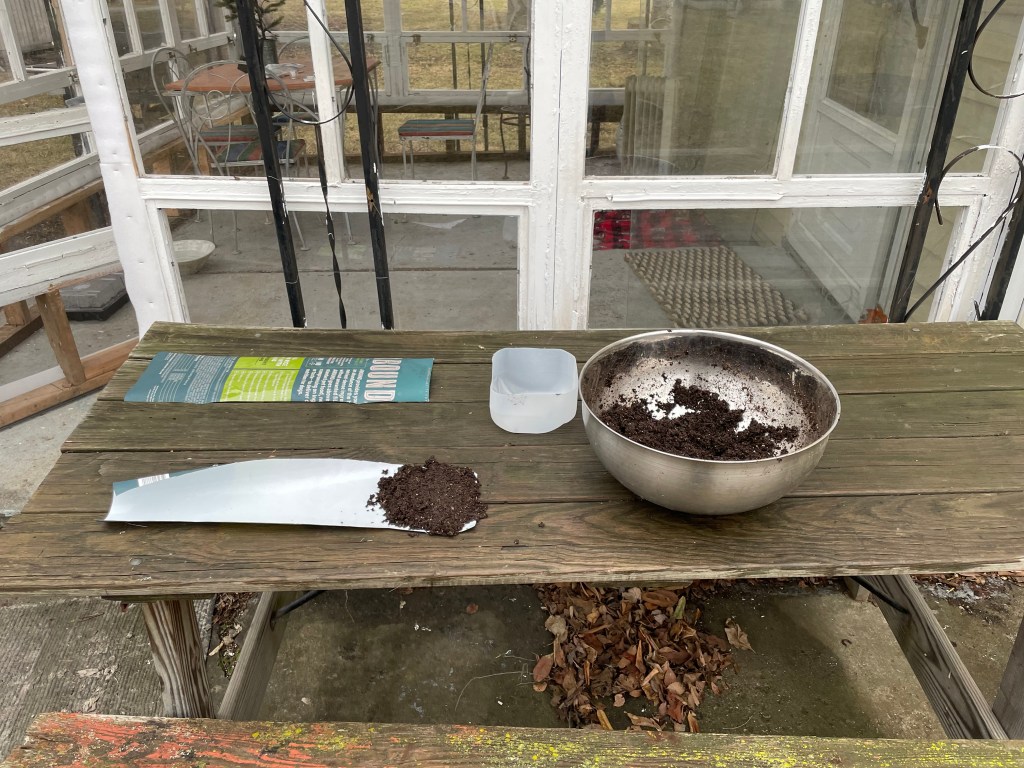
After the soil covers the entire strip, start at one end and roll it up! I cut an empty milk jug in half to make a tray to store the snail in.
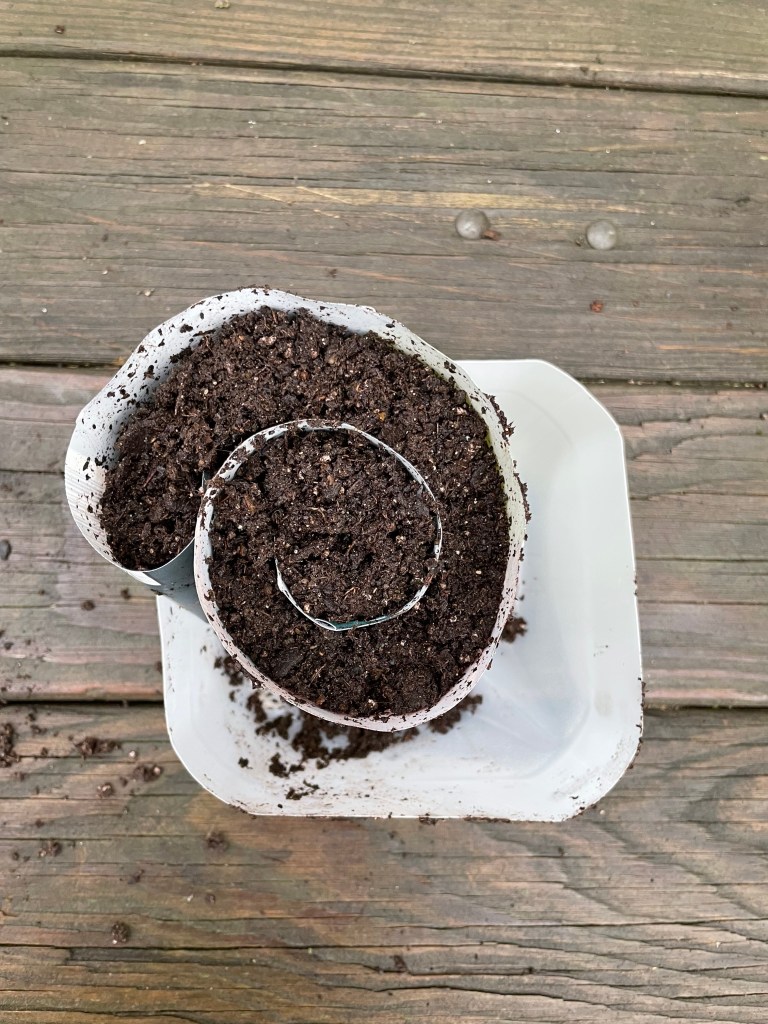
I tucked the end under instead of taping it, and that seems to work fine. Using a toothpick, I carefully added my last remaining seeds. The snapdragon seeds are light sensitive, so I didn’t cover them after sewing them, but I left about half an inch of empty space in the seed snail, which would be helpful for other seed types which do need to be buried.
Apparently, you can just unroll the snail and add more potting soil if the plants need a bit more to work with, instead of doing a complete transplant if the plants run out of grow room. That could be nice, as I’m not sure if the cells will be big for the snaps to stay in until late April. Of course, the success of that might depend on how sturdy the plants are, and I think snaps are a bit on the delicate side. They might not take too kindly to rolling around on the table while I unroll the snail. Also, I’m not sure if their roots will get tangled and cause problems for transplant.
I guess I’ll have to wait and see! I hate waiting ;).
Total plants needed:
I plan to plant the snapdragons in a 4×5 plot, spaced about 6 inches apart. I know that’s a little on the tight side, but I hear they do well in close quarters. Again, time will tell!
My calculations say I should be able to plant up to 67-87 plants depending on what I want to do with the outside row, and I’m sure I’ll have a certain percentage of no-grow seeds and broken stems during transplanting, so I planted 100 plants total. I’ll squeeze them into other boxes and areas if need be. (See how dangerous this logic is? It will be the same for every type of plant I grow…sigh. There’s always room for a few more plants, right? But then again, I don’t want to come up short! It’s a balancing act and a learning curve!)
Anyway, that comes up to two full 45 cell trays + what I grow in the seed snails.
I plan to update this blog post with new pictures when I’ve seen how these different techniques work, so hopefully it will be useful to those of you who are planning to try different methods next year.
Love or hate any of these techniques? Have you started any seeds yet this year? I’d love to hear from you!
Happy (early) growing!
-Angela

Leave a comment